How to Clean Reusable Water Bottle? A Detailed Guide
Last Updated on March 11, 2024 by Tina ShaoIn today’s eco-conscious world, reusable water bottles have become a staple for many. They’re not only environmentally friendly, reducing the need for single-use plastics, but also economical and convenient.
However, with regular use comes the responsibility of regular cleaning. In this article, we’ll delve into the various methods and tips to keep your bottle pristine, ensuring every sip you take is as refreshing and safe as the last.
Daily Cleaning Reusable Water Bottle
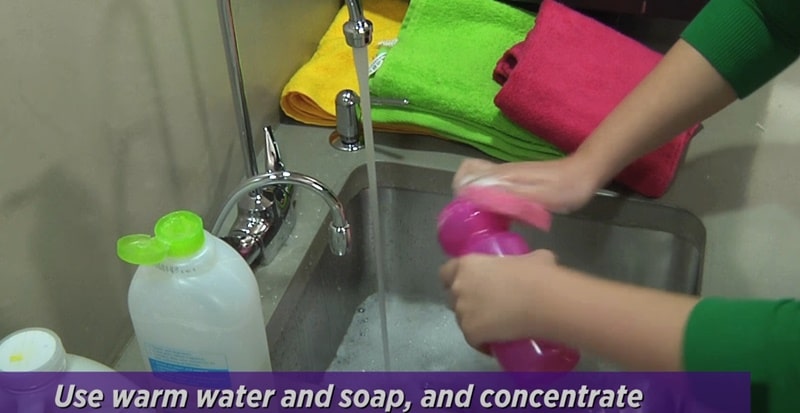
You can use some ways to clean your reusable water bottles daily.
Using Soap
- Separating Bottle Parts Before Cleaning: Before you begin the cleaning process, it’s essential to disassemble the bottle to ensure a thorough clean. Unscrew the cap, remove any straws or inner seals, and set them aside. This allows you to access all the nooks and crannies where bacteria and mold might hide.
- Preparation: Start by emptying any leftover liquid from the bottle. If there are visible residues or particles, a preliminary rinse with plain water can help remove them.
- Soap Solution: Fill the bottle about one-third full with warm water. Add a few drops of dishwashing liquid. The amount of soap needed will vary based on the bottle’s size, but a teaspoon is usually sufficient for standard-sized bottles.
- Shake It Up: Screw the cap back on the bottle and shake it well. This helps the soapy water reach all parts of the bottle and start cleaning.
- Scrubbing: Using a bottle brush, scrub the bottle’s interior thoroughly. Pay special attention to the bottom and any grooves or ridges where residues might accumulate. The brush’s bristles will help dislodge stubborn particles and ensure the soap reaches every surface.
- Cap Cleaning: The bottle’s cap can often be a hotspot for bacteria, especially around the threads and underseals. Use the bottle brush or an old toothbrush to scrub the cap, ensuring you reach all its parts.
- Rinse: Once you’ve scrubbed the bottle and cap, rinse them thoroughly under running water. Ensure all the soap is washed away, as any residues can affect the taste of your water.
- Drying: After rinsing, leave the bottle and cap open to air dry. This ensures any remaining moisture evaporates, preventing bacterial growth. If you’re in a hurry, pat them dry with a clean towel.
Using Boiling Water
Boiling water is a time-tested method for sanitizing and cleaning. The high temperature kills most bacteria, mold, and pathogens, ensuring your bottle is clean and sanitized.
Clean Reusable Water Bottle with Boiling Water Steps:
- Preparation: Empty the bottle and give it a preliminary rinse with plain water to remove any loose particles.
- Boiling: Fill a pot with enough water to submerge your bottle. Bring the water to a boil. Once boiling, immerse your bottle (and its parts) in the boiling water for about 5-10 minutes. Ensure the bottle is fully submerged.
- Soap Addition (Optional): While boiling alone is effective, adding a few drops of dish soap can enhance the cleaning process, especially if stubborn residues are inside the bottle.
- Rinse and Dry: After boiling, carefully remove the bottle using tongs and let it cool. Rinse it under cold water to remove any soap residues, and let it air dry.
Daily cleaning of your reusable water bottle is crucial for maintaining its hygiene and ensuring your health. Whether you opt for the soap or boiling water technique, regular maintenance will keep your bottle in top condition and your water tasting fresh.
Deep Cleaning Methods
Using Bleach and Baking Soda
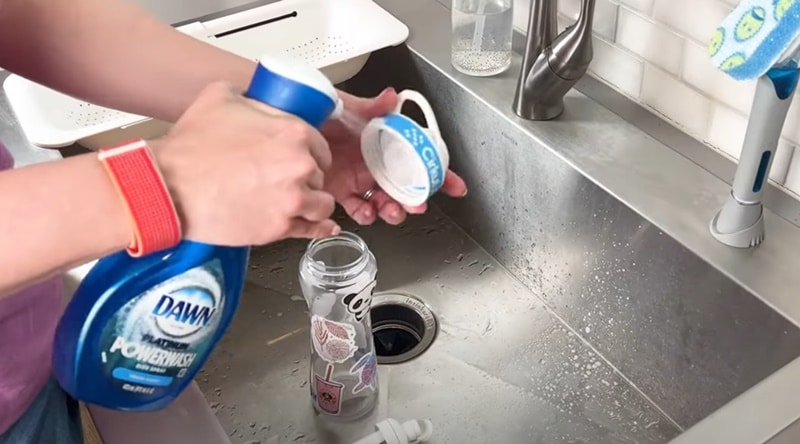
Bleach and baking soda are powerful cleaning agents that help deep clean and sanitize your water bottle. This method is particularly useful when there’s a persistent odor or visible mold or the bottle hasn’t been cleaned for an extended period.
Steps:
- Preparation: Empty the bottle and rinse it with plain water to remove loose particles or residues.
- Bleach Solution: Add a teaspoon of unscented bleach to the bottle. Using unscented bleach is essential, as scented versions can leave a residue affecting your water’s taste.
- Add Baking Soda: Add two tablespoons of baking soda to the bottle. Baking soda acts as a gentle abrasive, helping to scrub away any stubborn residues and neutralize odors.
- Fill with Cool Water: Fill the bottle with cool water, leaving some space at the top to allow for shaking.
- Shake and Soak: Screw the cap on the bottle and give it a good shake to mix the solution and ensure it reaches all parts of the bottle. Once mixed, let the bottle sit with the solution overnight. This prolonged exposure ensures thorough sanitization and deep cleaning.
- Rinse Thoroughly: The next morning, empty the bottle and rinse it multiple times with plain water. Ensure all traces of bleach and baking soda are washed away.
- Drying: Let the bottle air dry completely before using it. Ensure it’s fully dry to prevent bacterial growth.
Using bleach and baking soda provides a thorough cleaning, ensuring your bottle is clean, sanitized, and odor-free.
Using Vinegar
Vinegar, particularly white vinegar, has been a trusted household cleaning agent for generations. Its natural acidic properties make it an effective solution for cleaning, disinfecting, and deodorizing various surfaces, including reusable water bottles.
Steps:
- Preparation: Begin by emptying your bottle and giving it a quick rinse with plain water to remove any loose particles.
- Vinegar Solution: Fill the bottle about halfway with white vinegar.
- Add Cool Water: Fill the rest of the bottle with cool water, leaving a little space at the top.
- Shake and Soak: Screw the cap onto the bottle and give it a good shake to mix the vinegar and water. Once mixed, let the bottle sit with the solution overnight. This extended soak allows the vinegar to break down residues, kill bacteria, and neutralize odors.
- Rinse Thoroughly: The next morning, empty the bottle and rinse it several times with plain water. It’s essential to rinse it well to remove all traces of vinegar, as any remnants can affect the taste of your water.
- Drying: Allow the bottle to air dry completely. Ensure it’s thoroughly dry before using it to prevent bacterial growth.
In conclusion, vinegar offers a natural, effective, and eco-friendly solution for deep cleaning your reusable water bottle. Its disinfecting and deodorizing properties ensure your bottle remains in top condition, ready for your next hydration session.
Using Brushes for Bottles
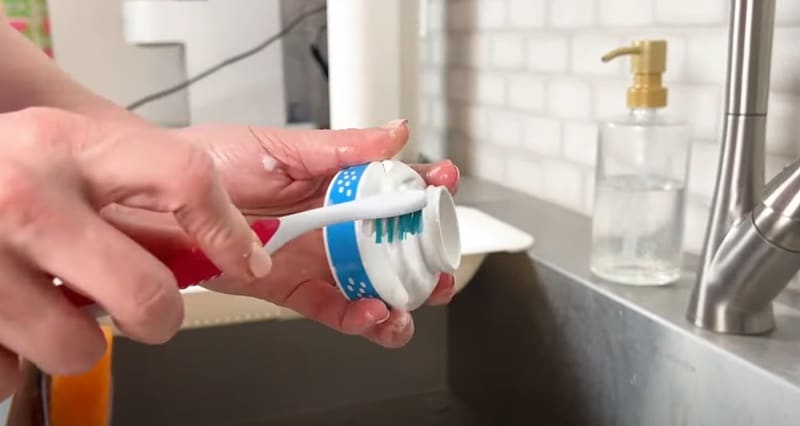
Cleaning reusable water bottles can sometimes be challenging, especially when they have intricate designs, narrow necks, or are particularly tall. This is where specialized bottle brushes come into play. These brushes are designed to reach every nook and cranny of a bottle, ensuring a thorough clean.
Ensuring a Thorough Clean for Bottles with Narrow Necks:
- Deep Cleaning: The slim design of bottle brushes allows them to reach deep into bottles with narrow necks, ensuring that even the bottom of the bottle is scrubbed clean.
- Rotational Cleaning: By rotating the brush while cleaning, you can ensure that the entire circumference of the bottle’s interior is covered. This rotational motion helps in dislodging any stubborn residues.
- Bristle Density: A good bottle brush will have densely packed bristles, which increases its cleaning efficiency. The bristles can get into small crevices and grooves, ensuring a thorough clean.
- Safety Tip: Many bottle brushes come with a rounded or padded tip, ensuring the interior isn’t scratched during cleaning.
Investing in a good set of bottle brushes ensures your bottle is rinsed and thoroughly cleaned, promoting better hygiene and ensuring that every sip you take is as refreshing as possible.
Using Dishwasher
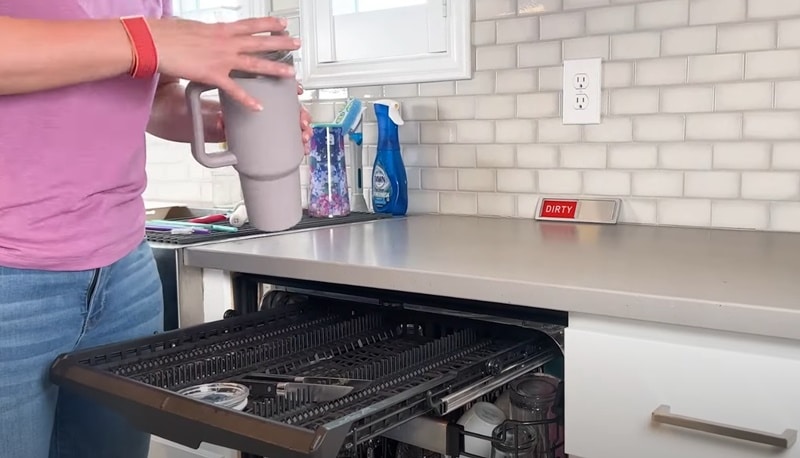
Cleaning water bottles in a dishwasher can be convenient and effective, especially for those who use their bottles daily. However, not all bottles are designed to withstand a dishwasher’s high temperatures and intense water pressure.
Identifying Dishwasher-Safe Water Bottles:
- Check the Label: Many water bottles will have a label or sticker indicating whether they are dishwasher safe. A dish under the running water symbol often represents this.
- Brands Known for Dishwasher-Safe Bottles: While it’s always essential to check individual product details, some brands known for producing dishwasher-friendly bottles include:
- Nalgene
- CamelBak (specific models)
- Contigo (specific models)
- Hydro Flask (stainless steel models without non-stick interior)
- Klean Kanteen (specific models)
- Material Matters: Generally, stainless steel reusable water bottles and certain hard plastics are more likely to be dishwasher-safe. However, bottles with intricate designs, multiple parts, or those made from softer plastics might not fare well in a dishwasher.
Using Denture Tablets
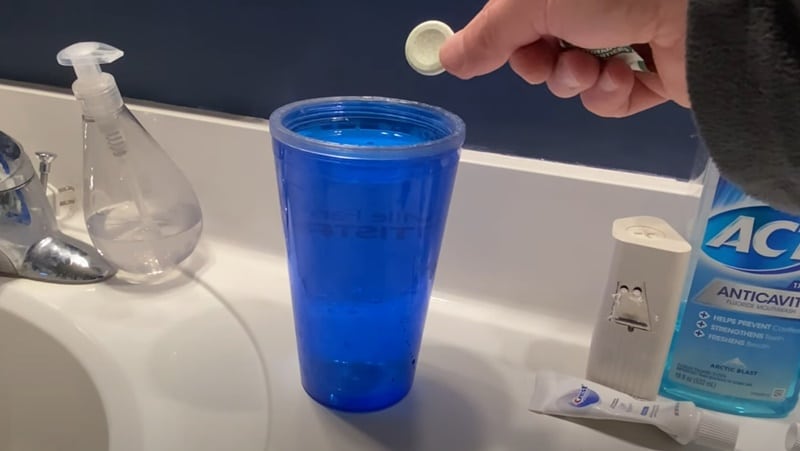
While designed for cleaning dentures, dentistry tablets have proven to be an effective and gentle cleaner for various items, including water bottles. Their effervescent action can help remove stains, odors, and residues.
Method of Using Denture Tablets for Cleaning:
- Fill the Bottle: Start by filling your water bottle with warm water.
- Drop in the Tablet: Add one or two denture tablets to the water. The number of tablets might vary based on the bottle’s size and the extent of staining or residue.
- Let it Fizz: Let the tablet dissolve and fizz in the bottle. This usually takes 10-30 minutes, but you can let it sit for a few hours or overnight for tougher stains.
- Shake and Scrub: Shake the bottle well once the tablet has fully dissolved. You can use a bottle brush to scrub the interior for stubborn residues.
- Rinse Thoroughly: Empty the bottle and rinse it with plain water to remove all residues from the denture tablet.
- Dry: Let the bottle air dry completely before using it.
In conclusion, while traditional cleaning methods are effective, sometimes unconventional methods like dishwasher or denture tablets can provide a thorough and convenient cleaning. Always ensure you rinse and dry your bottle properly, regardless of the cleaning method used, to maintain its hygiene and longevity.
Cleaning Straws and Lids of Reusable Water Bottles
While the main body of a reusable water bottle might be relatively straightforward to clean, the straws and lids can present unique challenges. These components often have intricate designs, small crevices, and hard-to-reach areas where bacteria and mold can thrive if not cleaned properly.
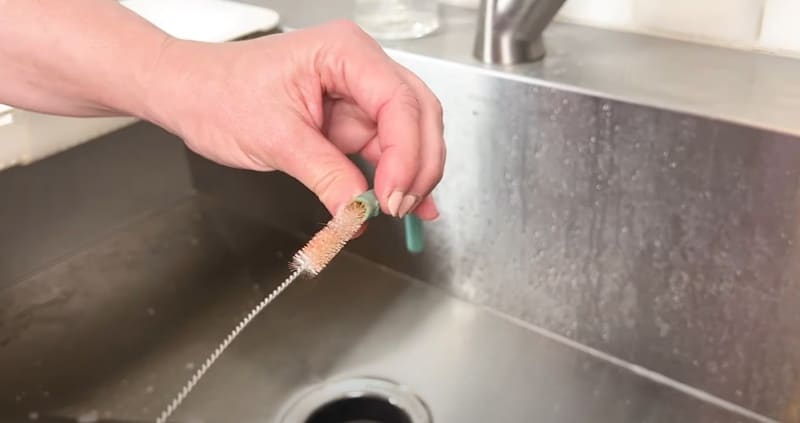
Effective Cleaning Techniques:
- Disassemble When Possible: Disassemble the lid and remove the straw before cleaning. This allows you to access all parts of these components.
- Straw Brushes: These are slender brushes specifically designed to clean the inside of straws. Insert the brush into the straw and scrub back and forth to remove all residues.
- Q-tips for Precision Cleaning: Q-tips are excellent for cleaning the small crevices and grooves in lids. Dip a Q-tip in soapy water or vinegar to scrub these hard-to-reach areas.
- Soaking: For particularly stubborn residues or to sanitize, consider soaking the straws and lids in a solution of vinegar or mild bleach. Ensure you rinse them thoroughly afterward.
- Shaking with Soapy Water: Fill the lid (with the straw attached) with soapy water, seal it, and shake vigorously. This can help dislodge any residues inside the straw and the lid’s crevices.
- Rinsing Thoroughly: After cleaning, it’s crucial to rinse the straws and lids thoroughly to ensure no soap or cleaning agent residues remain.
- Air Dry Completely: After washing, allow the straws and lids to air dry completely before reassembling and sealing the bottle. This ensures any remaining moisture evaporates, reducing the risk of bacterial or mold growth.
In conclusion, while straws and lids of reusable water bottles can be challenging to clean, you can ensure they remain hygienic and safe for use with the right tools and techniques. Regular cleaning and thorough drying are key to prolonging the life of your bottle and ensuring every sip is clean and refreshing.
Addressing Scuffs and External Marks
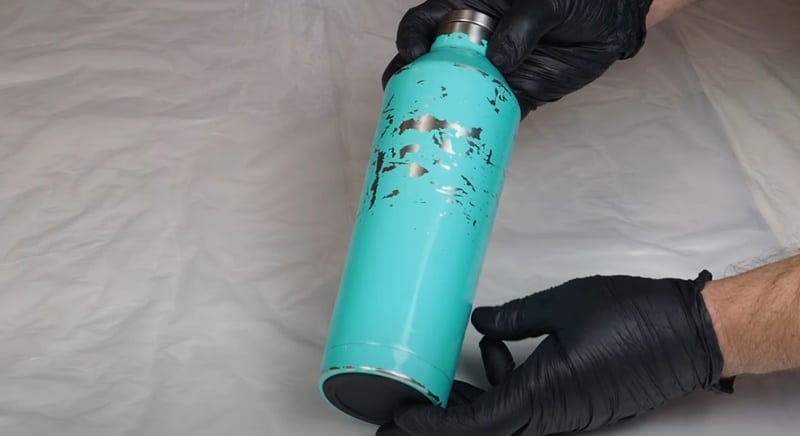
Reusable water bottles, especially those frequently used for outdoor activities, travel, or gym workouts, can often accumulate scuffs, scratches, and external marks over time. While these marks don’t affect the bottle’s functionality, they can detract from its appearance.
Fortunately, there are effective ways to address these blemishes and restore your bottle’s aesthetic appeal.
Using a Magic Eraser:
A magic eraser is a versatile cleaning tool made from melamine foam. Its micro-abrasive texture allows it to “erase” a wide range of marks and stains from various surfaces, including the exteriors of water bottles.
Steps to Remove Scuffs and Restore Appearance:
- Wet the Magic Eraser: Begin by dampening the magic eraser with a little water. Squeeze out any excess moisture, leaving the eraser slightly damp.
- Gentle Scrubbing: Gently scrub the scuffed or marked area using the magic eraser. Use circular motions and apply light to moderate pressure. The micro-abrasive texture of the eraser will work to lift and remove the scuffs.
- Check Progress: Periodically check your progress to ensure you’re not over-scrubbing or causing any damage to the bottle’s finish.
- Rinse the Area: Once the scuffs are removed, wipe the area with a damp cloth to remove any residue from the magic eraser.
- Dry the Bottle: Pat the bottle dry with a clean towel or let it air dry.
Tips and Precautions:
- Test on an Inconspicuous Area: Before using the magic eraser on the bottle’s main body, test it on a small, inconspicuous area to ensure it doesn’t damage its finish or color.
- Avoid Over-Scrubbing: Magic erasers are effective but can be abrasive. Avoid scrubbing too hard or long to prevent wear on the bottle’s surface.
- Not for Printed or Decorated Bottles: If your bottle has printed designs, logos, or decorations, be cautious when using a magic eraser near these areas, as it can remove or fade the print.
In conclusion, while scuffs and external marks on reusable water bottles are common, they don’t have to be permanent. With tools like the magic eraser and a gentle touch, you can effectively restore your bottle’s appearance, making it look as good as new.
Reusable Water Bottle Cleaning Frequency
The frequency with which you should clean your water bottle depends on various factors, including its usage and exposure:
- Daily Use: If you use your water bottle every day, it’s advisable to clean it at the end of each day. This ensures that any bacteria introduced during the day don’t have a chance to multiply overnight.
- Exposure to Other Liquids: If you use your bottle for beverages other than water, such as juices, sports drinks, or smoothies, it’s essential to clean it immediately after use. These beverages can leave residues that promote bacterial growth.
- Environmental Exposure: If your bottle is exposed to high temperatures, such as being left in a car on a sunny day, or if it’s frequently used in a gym or outdoor setting, it’s a good idea to clean it more often due to the increased risk of bacterial growth.
- Infrequent Use: Even if you don’t use your bottle daily, cleaning it before and after each use is essential. If it’s been sitting idle for a while, thoroughly clean it to ensure it’s free from contaminants.
While reusable water bottles are a convenient way to stay hydrated, it’s crucial to recognize the signs that they need cleaning. Regular maintenance ensures your water tastes fresh and protects your health by preventing bacterial and mold growth.
Conclusion
Throughout this article, we’ve explored various cleaning methods, from daily routines to deep cleaning techniques. Consistency and attention to detail are key, whether using soap and water, a dishwasher, or unconventional methods like denture tablets. Each method has its benefits, and the best approach often depends on the type of bottle, its usage, and personal preferences.
In conclusion, as we continue to embrace the eco-friendly practice of using reusable water bottles, let’s also commit to maintaining their cleanliness. Adopt a routine cleaning schedule, consider the various methods discussed, and ensure every sip you take is as pure and refreshing as nature intended.


